
Meet a Medievalist Maker: Eleanor Baker
“Meet a Medievalist Maker” is an ongoing series of blog posts introducing our members and the work they are doing. Each post is organized around our Four P’s: a project they are working on (or have completed but want to highlight); their process: medium, etc; a peek at their work: images or excerpt; and a prompt: instructions for a brief exercise they share to allow readers to experience/explore their process. Would you like to write a post introducing yourself and your work? Send us an email!
My name is Eleanor Baker, and I’ve recently been musing on one of Geoffrey Chaucer’s most recognisable lines: ‘The lyf so short, the craft so long to lerne’. In this quotation from the Parlement of Foules, Chaucer reminds us (perhaps somewhat exasperatedly) that crafting in any medium is a process of continual learning, and one that far exceeds the span of a human life. Finding joy and interest in the process of trial and error, in frustration and success, in the ‘lernyng’ itself, is what I try to do with my favourite creative-critical practice: lino cutting.
Process
I first began linocutting in the UK Covid-19 lockdown of December 2020 after being frustrated at the Christmas card designs on offer and deciding to make my own. I had an pre-existing academic interest in craft practice as my doctorate was concerned with how late medieval English literature made reference to the materiality of their texts. I also developed an interest printmakers and illustrators (namely of the twentieth century and twenty-first centuries) who represent medieval literature and culture visually, such as Amy Jeffs, Richard Bawden, David Gentleman, and Clive Hicks-Jenkins (among others), and folk horror, which often manifests in print.
The process of designing, slowly carving, and printing has taught me a great deal about medieval culture and myself. Lino cutting is absorbing and requires your brain, eyes, and both of your hands. It forces you to slow down: you cannot carve lino while also scrolling on your phone or responding to emails (unless you want to slice into your own fingers, which I have done), and it is interesting to reflect on which aspects of a text or material object I am prioritising, and what I am omitting. It has made me think more carefully about my writing and research: what blank spaces am I leaving? Does my detail overwhelm or add depth? What is more important to me in this piece - the process or the end product?

A Christmas card design featuring the burden of 'Make We Merry Both More and Less', a carol from the sixteenth-century commonplace book of Richard Hill held at Balliol College, Oxford.
Project
One project which I enjoyed working on recently was developing a linocut print in response to Guild Co-Founder Laura Varnam’s poetry. Laura sent me the sequence of poems that she had written inspired by Grendel’s Mother that were due to be published in Primers Volume Seven (Nine Arches Press, 2024), and I sketched up a few designs. We selected one of my sketches to work up into a print; this was the response to ‘The Name of the Father’, which you can read about in Laura’s post here. I really enjoyed discussing Laura’s poems with her, and unpicking precisely which elements (from both the original texts and Laura’s reimaginings) I was responding to.
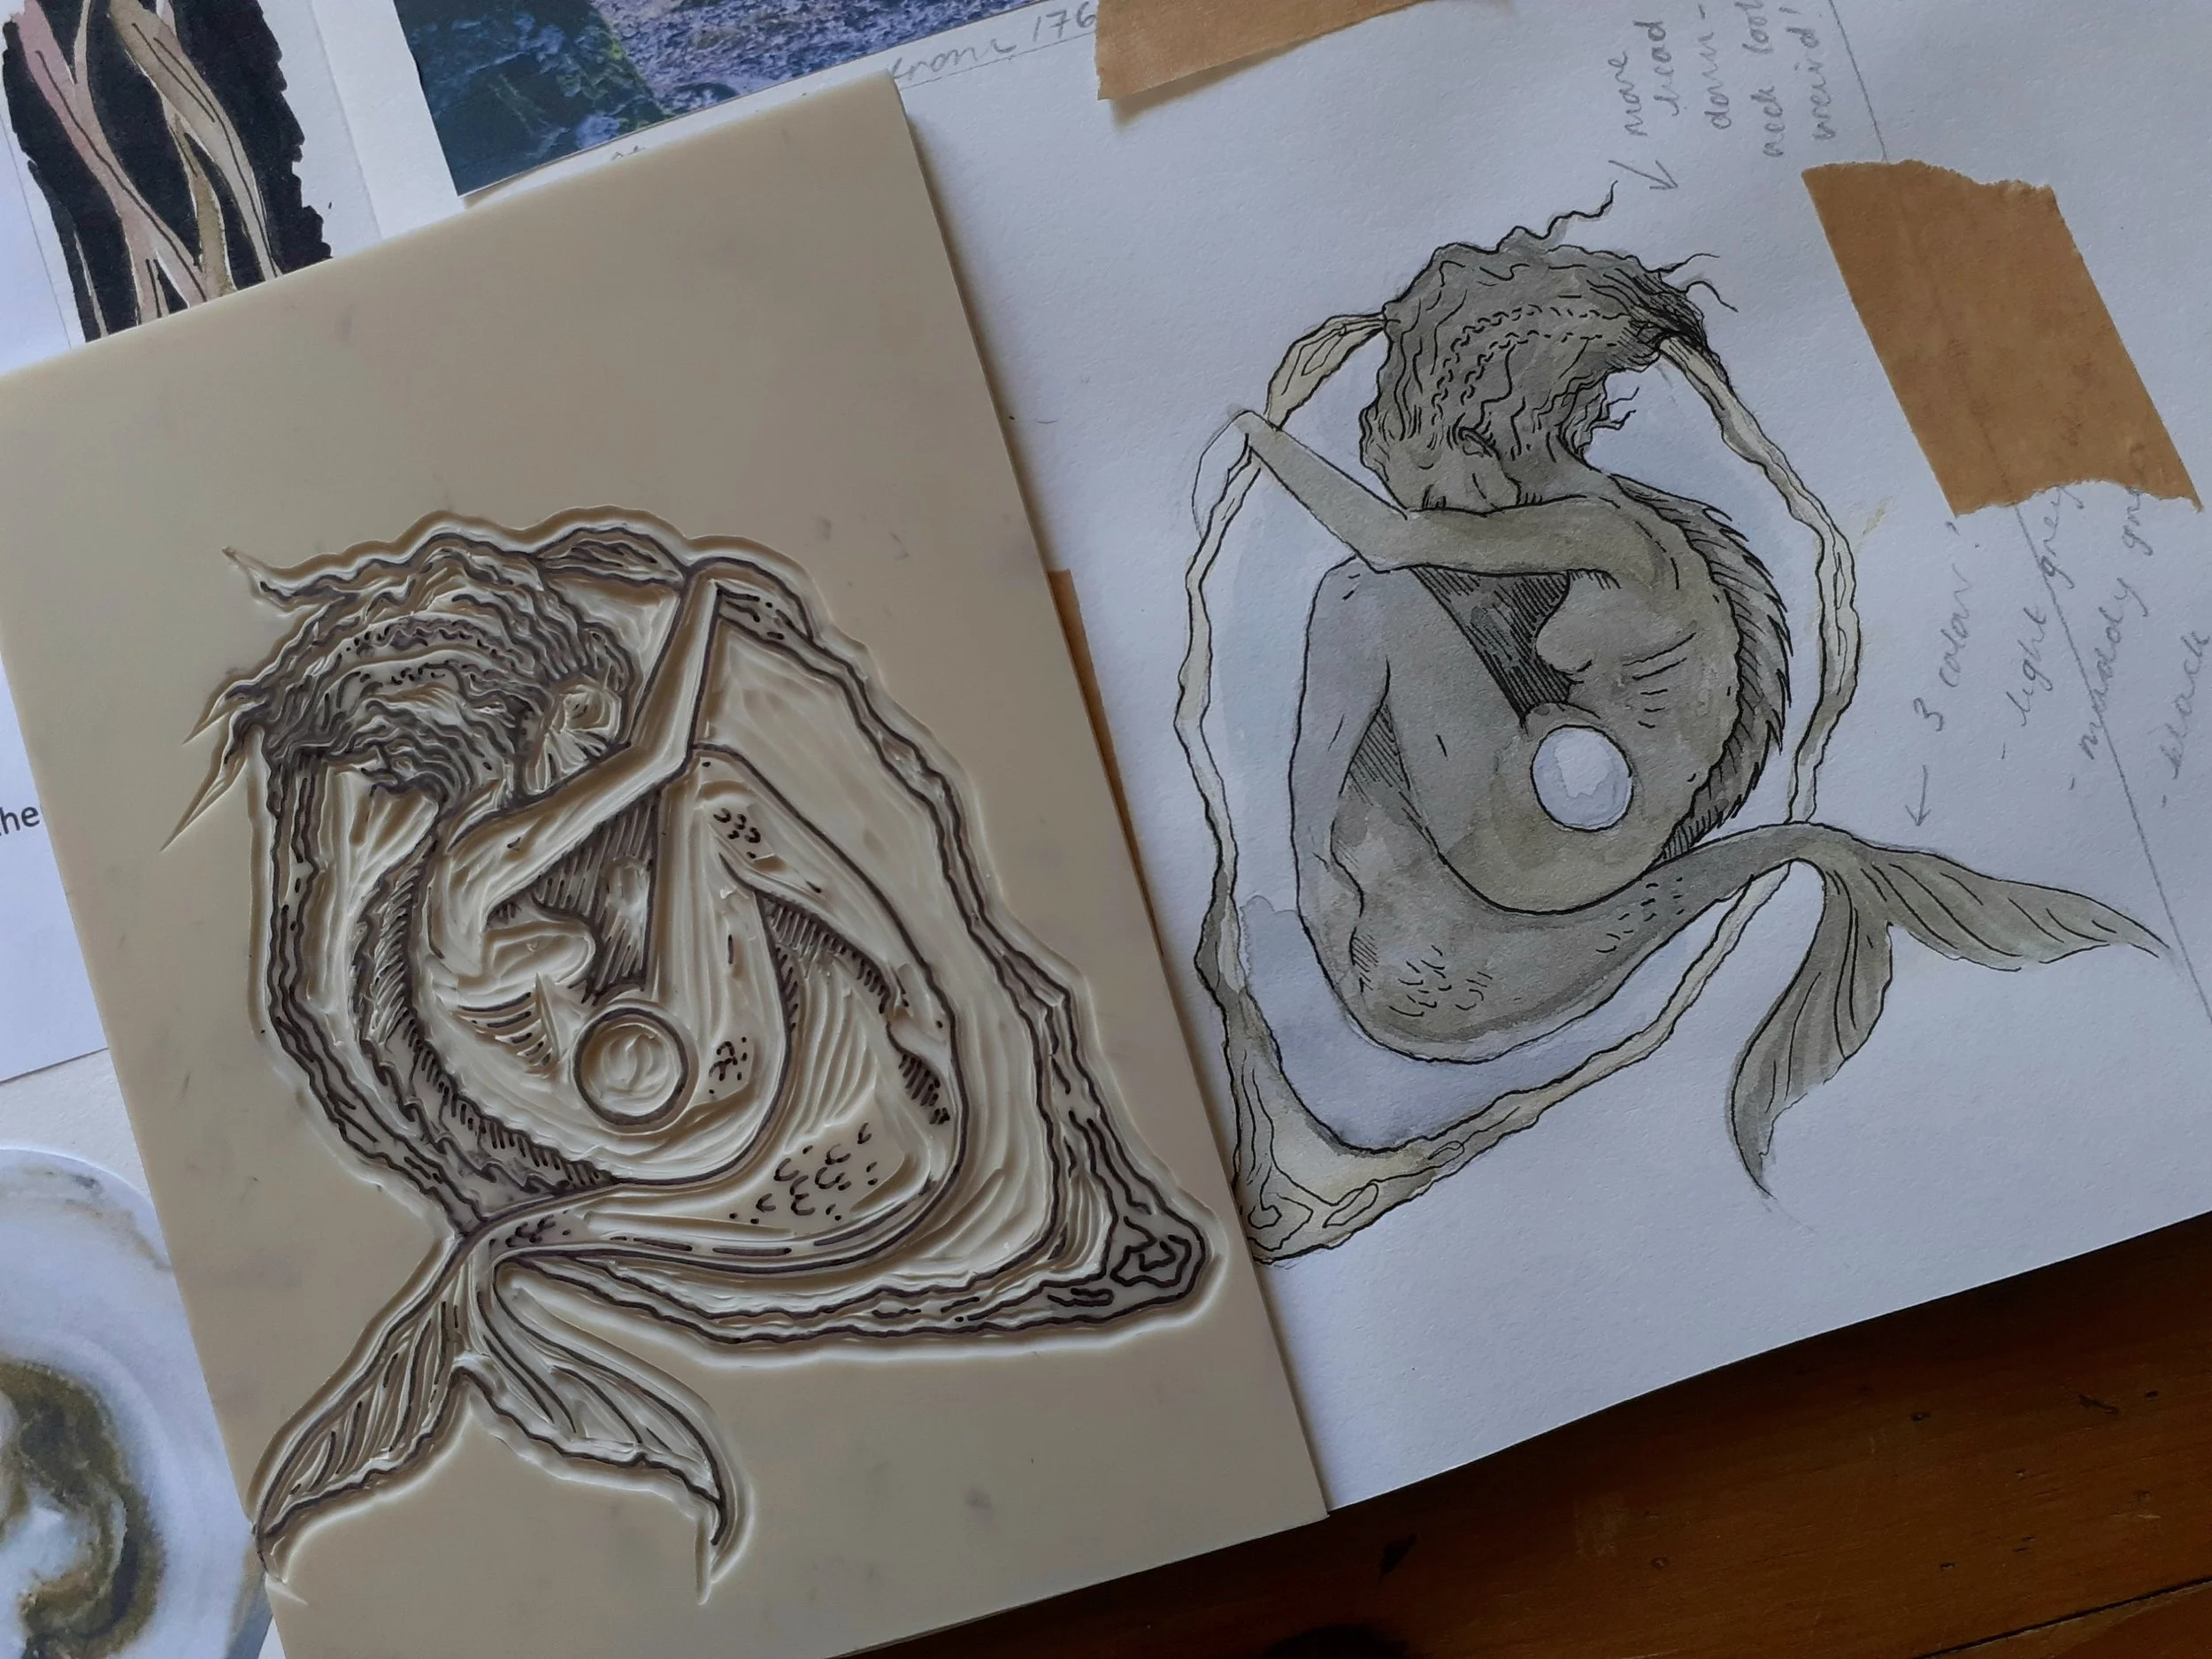
The lino block bearing the design in permanent marker with the first cuts made facing the original watercolour sketch.
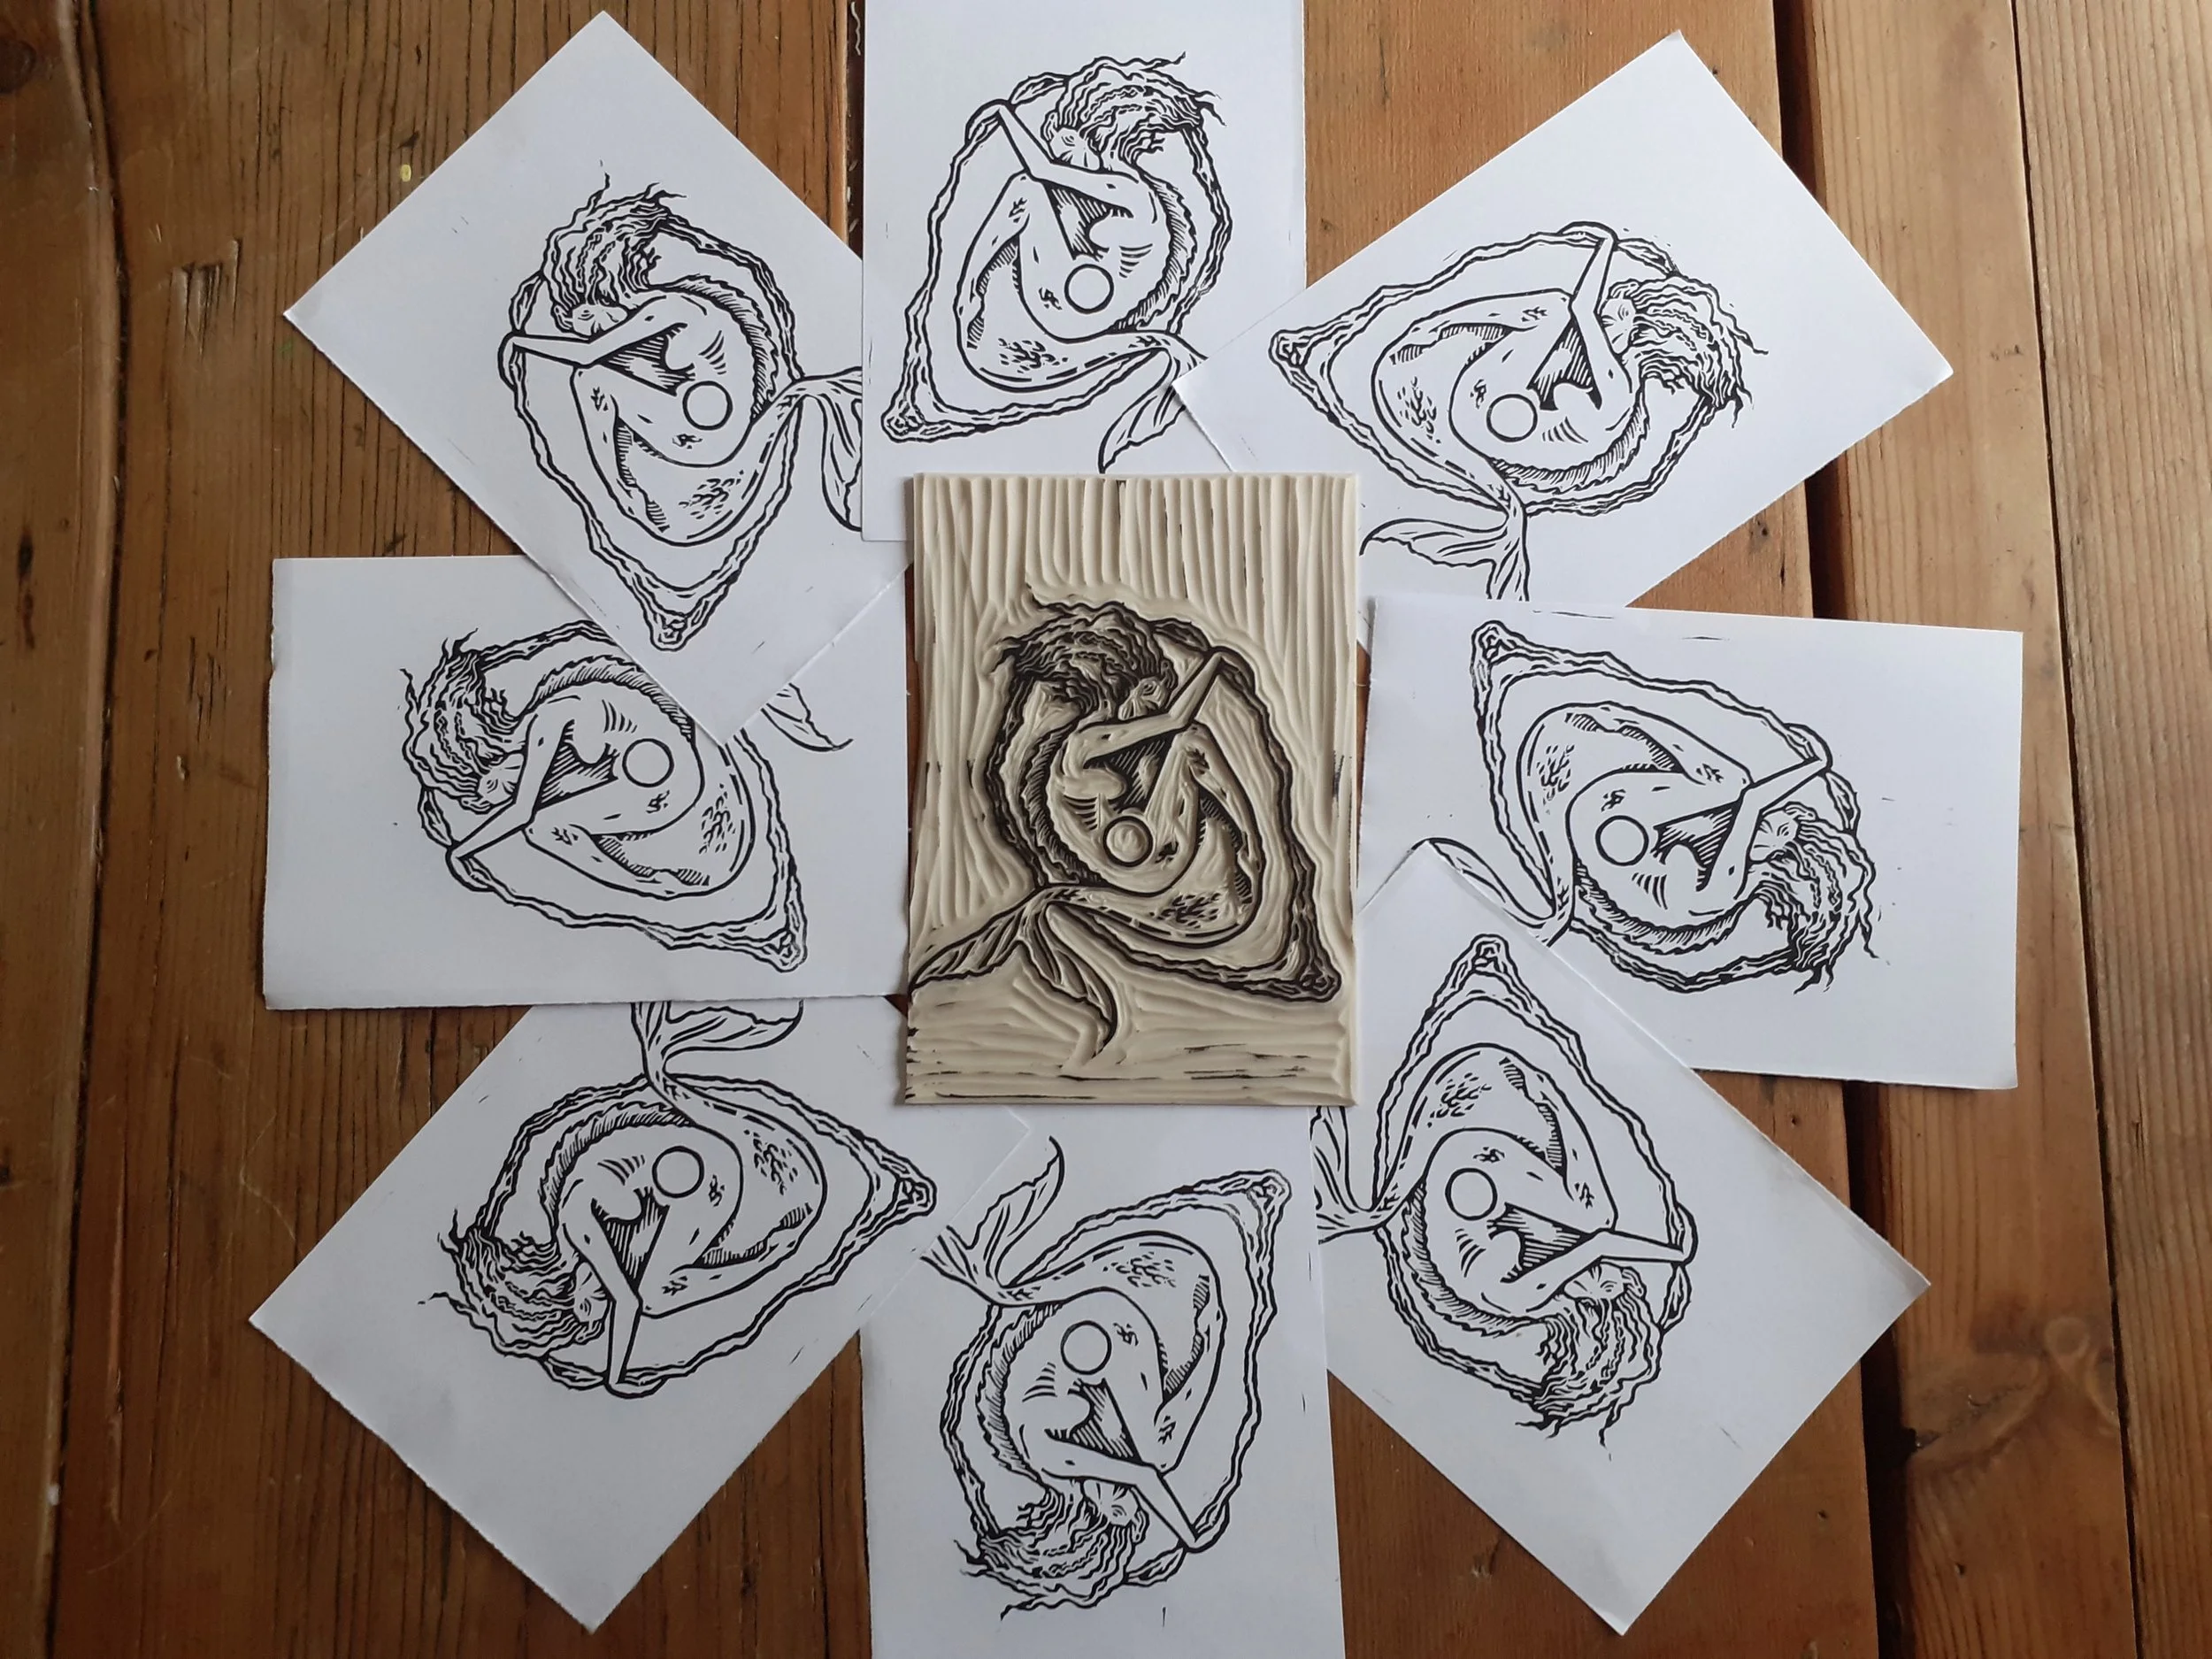
A whirl of Grendel’s Mothers with the ‘key’ linocut block itself in the centre.

The three lino blocks which make up the print bearing their different coloured inks.
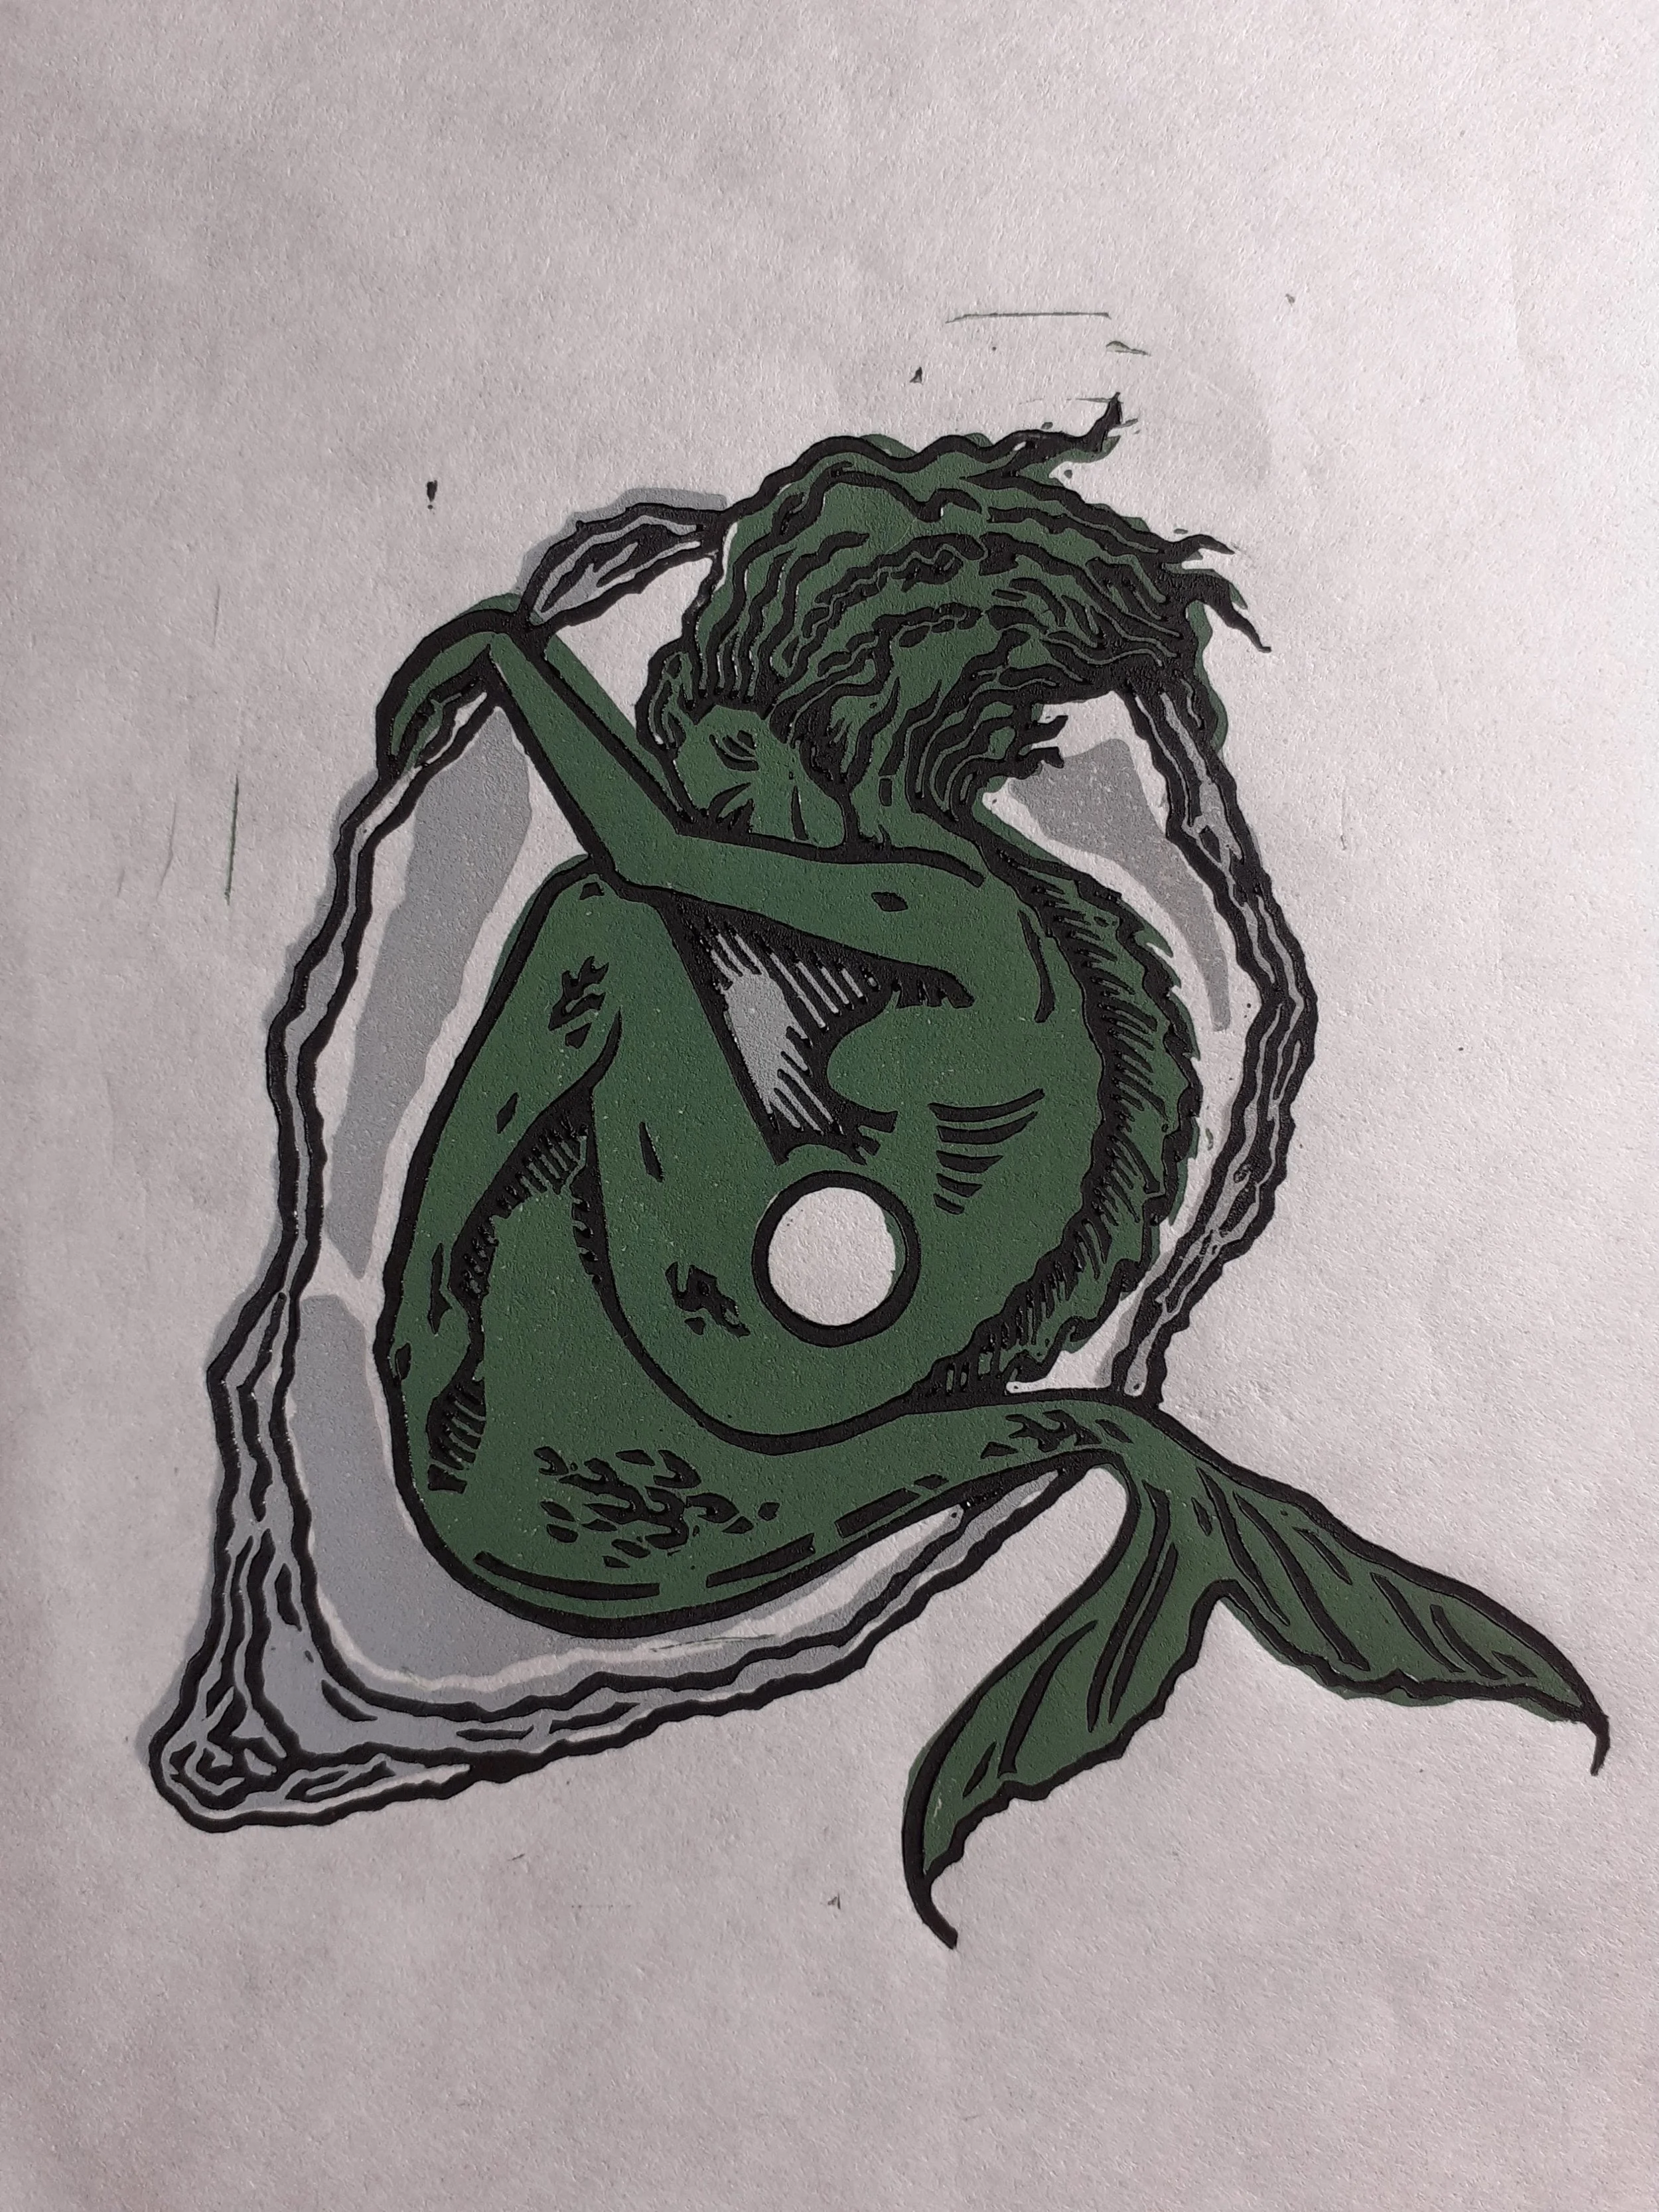
The final print of all three blocks. Registration (lining up all the blocks together) is a real challenge, but I like to think it offers a visual sense of ‘breaking the boundaries’ as Grendel’s Mother, and Laura Varnam herself, are doing. That’s my excuse, anyway.
I also designed the Guild of Medievalist Makers logo, which is part-linocut, part digital design. We wanted a visual representation of our CORD, and a design that echoed those of medieval merchant guild signs. The outer ring is a rope representative of our cord, and this rope ties together the emblems representative of different creative responses at the low-point of the ring, where it binds a needle and thread, a paintbrush, and a quill pen.

Peek
Alas (as part of the craft of learning, I suppose) I have not recently been affording as much time to linocutting as I would like to, but I am finding the Guild’s Making Space Sessions are helping me prioritise time for making it happen; you can see our upcoming sessions here. In 2024 my first trade press book, Book Curses, was published with Bodleian Publishing and I have just signed a contract to write another, Tales of Horror from Medieval England, which will feature my linocuts alongside each chapter headings, so these will be keeping my hands busy for a while.

A linocut inspired by a book curse by Jean Gembel, who wrote her threatening malediction in a book of culinary recipes (including many for preserves, hence the strawberries, oranges, and steaming cauldron).
Prompt
One of the most intimidating aspects of lino cutting can be getting started, but it needn’t be an expensive commitment, and there’s more flexibility than you think. You can buy a beginner’s lino cutting tool very cheaply (I recommend the red-handled Esdee brand) and create stamps easily by using rubbers (that’s an ‘eraser’, if you’re American). You can follow the steps below to make you own stamp:
You will need:
A HB pencil
Paper
A permanent marker
A pack of rubbers
A lino cutting tool
An ink pad of your favourite colour
Step 1: Noodle around on your favourite manuscript repository website and find a small and simple illustration or letter form that you would like to replicate.
Step 2: Draw around your rubber on your piece of paper to see the maximum size of your design. Draw your design onto a sheet of paper.
Step 3: When you’re happy with your design, place the paper on your rubber so that it covers it, and scrub over the back of the paper with your pencil so that it transfers.
Step 4: Draw over your transferred design on your rubber with a permanent marker. This is so it does not smudge when you start to cut.
Step 5: Cut out your design by cutting away all the material that does not have pen on it. There are lots of tutorials online that will help you with finding the correct angle.
Step 6: Press your ink pad onto your rubber to cover the raised surface with ink
Step 7: Stamp your rubber onto your paper to transfer your design. You may find that there are some little lines transferring from your cutting, this is called ‘chatter’, and can make your print characterful, but you may wish to remove it for a cleaner design.
